
Blow Molding In-Mold Labeling: Integrated Decoration for Hollow Containers
Blow Molding In-Mold Labeling: Integrated Decoration for Hollow Containers
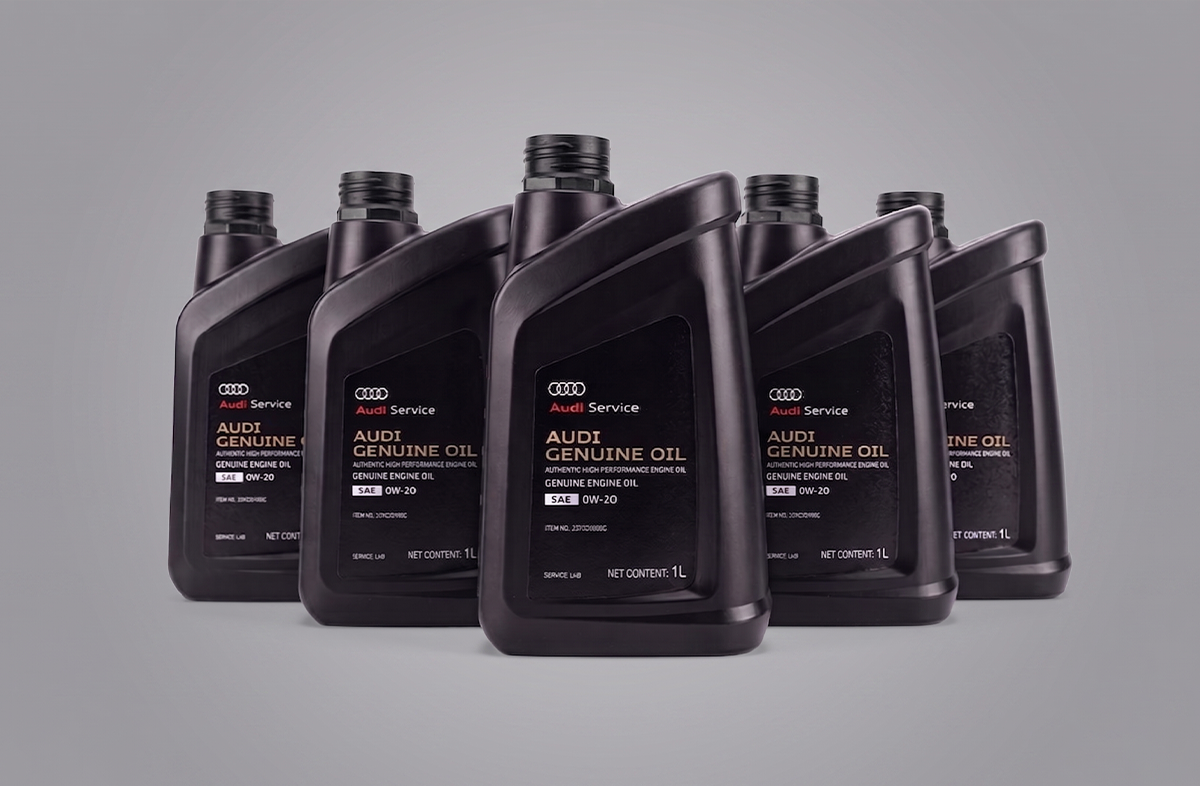
In the in-mold labeling (IML) technology family, blow molding IML is one of the earliest directions to achieve industrial application. It is especially suitable for producing various hollow containers, such as detergent bottles, shampoo bottles, oil bottles, beverage bottles, and pharmaceutical packaging bottles. This technology combines blow molding and labeling into one step, decorating the container at the exact moment it is formed, improving production efficiency, appearance quality, and environmental performance.
1. Why Choose Blow Molding In-Mold Labeling?
Blow molding itself is a process in which a thermoplastic polymer is extruded into a tubular parison, then inflated with compressed air to conform to the mold cavity, and cooled to obtain a hollow product. When combined with in-mold labeling, it delivers the following core values:
Eliminates post-mold labeling: Conventional hollow containers require separate pressure-sensitive labeling or shrink sleeve labeling after blow molding. IML completes decoration in‑mold in one step, saving labor, equipment, and floor space.
Same-material integration: The label and container are made of the same or compatible plastic (e.g., PE label with PE bottle). After molding they fuse into one – no risk of label peeling, and the whole bottle can be directly ground for recycling.
360° wrap‑around decoration: Blow molding IML can place labels on the front, back, and even sides of the bottle, achieving full‑circumference graphics, which is visually superior to partial labeling.
High environmental resistance: Because the label is fused with the container, it is waterproof, oil‑resistant, resistant to high and low temperatures, and scratch‑resistant – ideal for daily chemical, personal care, and chemical packaging.
These advantages make blow molding IML the ideal choice for high‑volume hollow container production.
2. Detailed Process Flow
The blow molding IML process can be broken down into the following steps:
Step 1: Label preparation and placement
Pre‑printed in‑mold labels are stacked as single sheets in multiple label magazines on the IML machine (usually corresponding to front label, back label, and sometimes neck or bottom label). The printed side faces up, and the back side (with solid adhesive) faces down.
When the mold opens, an automated robot (typically equipped with vacuum suction cups) picks up the front and back labels simultaneously from the magazines. The robot transfers the labels to the inner walls of the mold, placing them with the printed side facing the mold cavity wall (i.e., toward the final visible outer surface of the container) and the solid adhesive side facing the side that will be filled with plastic. At this point, vacuum holes in the mold activate, holding the labels firmly against the cavity walls by negative pressure, ensuring that the labels do not shift during mold closing and blowing.
Step 2: Parison extrusion
Meanwhile, plastic material (typically HDPE, LDPE, PP, etc.) is plasticated in an extruder and extruded through a die to form a hollow tubular parison. The parison hangs vertically downward, and its length is precisely controlled by a controller according to product dimensions.
It is important to note that the parison must have uniform temperature and wall thickness during extrusion; otherwise, the blown container will have uneven wall thickness, which may cause poor label fusion or deformation in the label area.
Step 3: Mold closing and parison clamping
When the parison reaches the preset length, the mold – with labels already held in place – closes quickly. The clamping parts of the mold pinch and cut the top and bottom of the parison, while a low‑pressure pre‑blow (optional) may be applied inside the parison. As the mold closes, the labels are trapped between the cavity wall and the outer surface of the parison.
Step 4: Blowing and fusion
High‑pressure compressed air is injected into the parison through a blow pin (located at the top or bottom of the mold), causing the molten plastic tube to expand rapidly and press against the cavity wall. As the plastic expands, it presses directly against the back of the labels, which are already held by vacuum on the cavity wall.
At this time, the mold temperature is maintained within the melt temperature range of the plastic (typically 160–220°C, depending on the material). The solid heat‑activated adhesive on the back of the label melts under the high temperature, and at the same time the outer surface of the molten parison and the label substrate (same‑type plastic) undergo molecular chain interdiffusion, achieving melt fusion. The label is no longer “stuck” onto the container – it becomes part of the container wall.
Step 5: Cooling and demolding
After blowing is complete, the mold cooling system (usually water channels) starts to cool the container and label together to below the heat deflection temperature. During this process, the molten adhesive solidifies again, and the bond strength between the label and container reaches its maximum.
After cooling and solidification, the mold opens. The plastic container is finished – molded and labeled in one step – without any secondary operation, ready to go to the filling line or packaging.
3. Technical Characteristics of Blow Molding IML
| Parameter | Typical value / feature |
|---|---|
| Applicable materials | PE (HDPE, LDPE), PP, PET (few) |
| Typical products | 300ml – 5L hollow containers |
| Label holding method | Vacuum adsorption (multi‑station robot) |
| Number of labels | 1–4 (front, back, neck, bottom) |
| Cycle time | 5–12 seconds (depending on container size) |
| Bond strength | Non‑peelable (container breaks before label delaminates) |
| Recyclability | Label and bottle same material, can be directly ground and re‑pelletized |
4. Key Process Control Points
4.1 Parison wall thickness control
The wall thickness distribution of the parison directly affects the uniformity of the blown container wall. If the wall thickness is too thin in the area corresponding to the label, label fusion may be incomplete or mechanical strength may be reduced; if too thick, cost and cooling time increase. Modern blow molding machines are equipped with parison wall thickness control systems (axial and radial programming) that dynamically adjust thickness according to the mold profile.
4.2 Vacuum holding stability
The label must be firmly held against the cavity wall during mold closing and the initial stage of blowing. The vacuum system must meet the following requirements:
Vacuum level: typically –60 kPa to –90 kPa
Vacuum hole distribution: uniformly distributed within the label outline, hole diameter about 0.5–1.0 mm
Anti‑clogging design: clean vacuum holes regularly to avoid blockage by plastic dust or debris
4.3 Temperature matching
Mold temperature: typically controlled at 20–50°C (water‑cooled). Too high a mold temperature may cause label overheating/deformation or extend cooling time; too low may result in insufficient fusion.
Parison temperature: extrusion temperature should provide good melt flow without burning the label ink. Typical parison temperatures: PE 160–200°C, PP 190–230°C.
4.4 Label positioning accuracy
When the robot places labels into the mold, the positional deviation should be controlled within ±0.5 mm. For double‑sided labels, the relative position accuracy of front and back labels is especially important; otherwise, the finished product will show graphic misalignment. High‑end equipment is equipped with vision positioning systems that automatically correct robot coordinates.
5. Common Defects and Troubleshooting
| Defect | Possible Causes | Solutions |
|---|---|---|
| Label lifting or shifting | Insufficient vacuum; parison touching label during mold closing; excessive blowing pressure | Check vacuum holes for blockage; increase vacuum level; adjust parison drop position; reduce initial blow pressure |
| Wrinkles on label surface | Label size mismatch with cavity; uneven parison wall thickness; label moisture absorption | Optimize label shrinkage compensation; adjust parison wall thickness profile; pre‑dry labels (50°C/30 min) |
| Poor fusion (label peels off) | Adhesive layer not fully melted; low mold temperature; low parison temperature | Increase mold or melt temperature; check adhesive expiration date; extend high‑temperature dwell before cooling |
| Bubbles/blisters on label | Air trapped between label and cavity; poor venting through vacuum holes | Increase number of vacuum holes; design micro‑venting channels on label back side; reduce static charge during label placement |
| Ink wash‑off (ink bleeding or blurring) | Poor heat resistance of ink; excessive parison temperature; too long contact time between label and parison | Use high‑temperature resistant ink; reduce extrusion temperature; speed up mold closing/blowing |
| Label edge tearing | Excessive blow‑up ratio; insufficient ductility of label substrate; sharp mold edges | Reduce blow‑up ratio; choose higher‑toughness label film; deburr mold edges |
6. Typical Application Examples
Shampoo bottles (HDPE) : Front and back double‑sided IML labels, replacing pressure‑sensitive labels. The bottle can be directly recycled because label and bottle are the same material – no separation needed. Water‑ and moisture‑resistant, no edge lifting in bathroom environments.
Detergent / fabric softener bottles (PE) : Large‑capacity containers (1L–3L) often use large wrap‑around labels. IML provides large brand display areas and excellent chemical resistance.
Oil bottles / motor oil containers (HDPE) : Labels must resist oil and high temperatures (engine compartment environment). The fused IML structure prevents oil penetration that could cause label peeling.
Pesticide / agrochemical bottles (HDPE) : Highly corrosive chemical packaging. Traditional labels easily corrode and fall off. IML bottles are seamless and safe, with no gaps for chemical attack.
Beverage bottles (PET, special process) : Although PET bottles typically use shrink sleeves, some premium water brands have adopted IML (requiring a special adhesive layer and mold cooling design).
7. Comparison with Injection Molding IML
| Feature | Blow Molding IML | Injection Molding IML |
|---|---|---|
| Container type | Hollow (bottles, jugs, cans) | Thick‑wall or complex shapes (cups, tubs, lids) |
| Label holding method | Vacuum adsorption | Electrostatic adsorption |
| Molding pressure | Low (compressed air 0.2–1.0 MPa) | Very high (50–200 MPa) |
| Wall thickness uniformity | Moderate (depends on parison control) | Excellent |
| Typical cycle time | 5–12 seconds | 3–8 seconds |
| Surface appearance | Good, but may have a pinch‑off line | Very high, no or hidden pinch‑off line |
| Tooling cost | Moderate | Higher |
| Typical materials | HDPE, LDPE, PP | PP, ABS, PS, PE |
8. Future Directions
All‑electric blow molding IML: Using all‑electric blow molding machines improves motion accuracy and repeatability, reduces oil contamination, and is suitable for food/medical packaging.
Integrated digital printing and IML: Incorporating digital printing directly into the blow molding line enables small‑batch, high‑mix customized IML production.
High‑barrier multilayer structures: Integrating high‑barrier layers (e.g., EVOH) into the IML label allows the label to provide both decoration and barrier functions, extending product shelf life.
Smart labels: Printing RFID or NFC antennas on the back of the label and embedding them into the container wall through in‑mold molding enables product traceability and intelligent packaging.
9. Conclusion
Blow molding in‑mold labeling is a mature technology that continues to evolve. By achieving “one‑step molding, permanent fusion,” it solves many pain points of conventional post‑mold labeling – label peeling, difficult recycling, and cumbersome processes. For industries such as daily chemicals, lubricants, agrochemicals, and even food and beverages, blow molding IML is a reliable choice to improve packaging quality and production efficiency.
Motek provides full technical support from label material selection, ink matching, vacuum system design for molds, to blow molding process tuning. For feasibility assessment or sample trials of blow molding IML, please contact the Motek technical team.
Contact Us
Name*
Telephone*
Region*
Please fill in your request*


